In this blog we are going to build a WDAC policy using some basic settings to make an initial audit policy that can be applied so we can figure out what crashes with our basic policy!
To create out Base policy we will use the fantastic “WDAC Wizard”! This application is great for building, editing and merging policies of all kinds. Especially for beginners, this tool makes life a lot easier than reading XML files.
Resources:
- WDAC Wizard Download: https://webapp-wdac-wizard.azurewebsites.net/
- WDAC Wizard documentation: https://learn.microsoft.com/en-us/windows/security/application-security/application-control/app-control-for-business/design/appcontrol-wizard
- WDAC Base Policy switches: Understand App Control for Business policy rules and file rules | Microsoft Learn
- LolBins: https://lolbas-project.github.io
Starting a Base policy
I trust you to install WDAC Wizard by yourself! If not there are probably guides for that elsewhere on the interwebz.
Depending on your target Windows OS and Version, you might want to take a look at my previous blog post for multi vs single policy format. But if you are running lets say Windows 11 24H1+ or Windows Server 2025+, you probably just want to roll with Multi-Policy format!
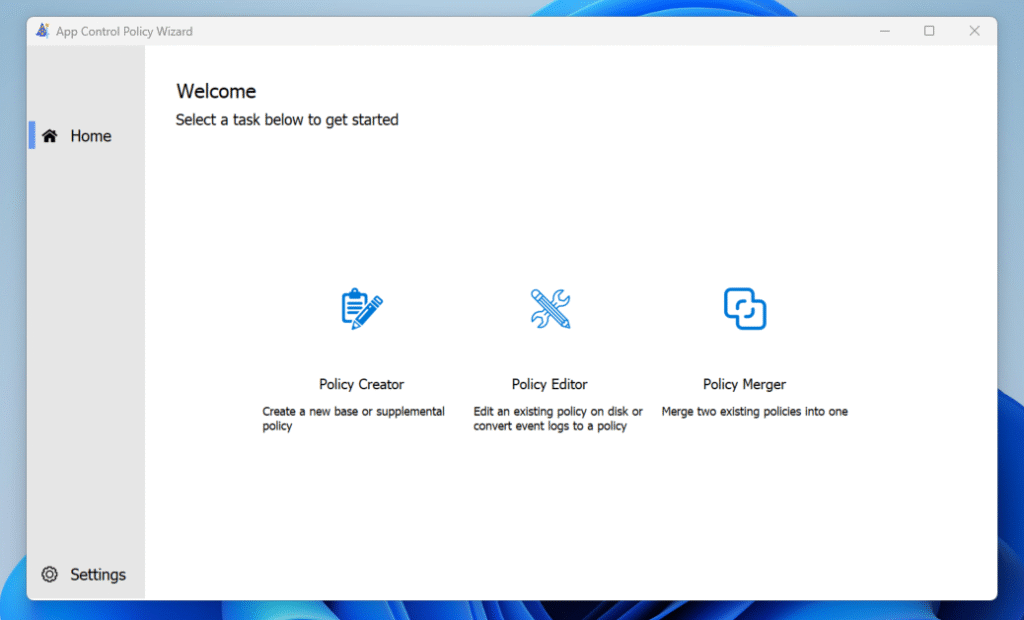
Step 1: In your WDAC Wizard GUI select “Policy Creator”:
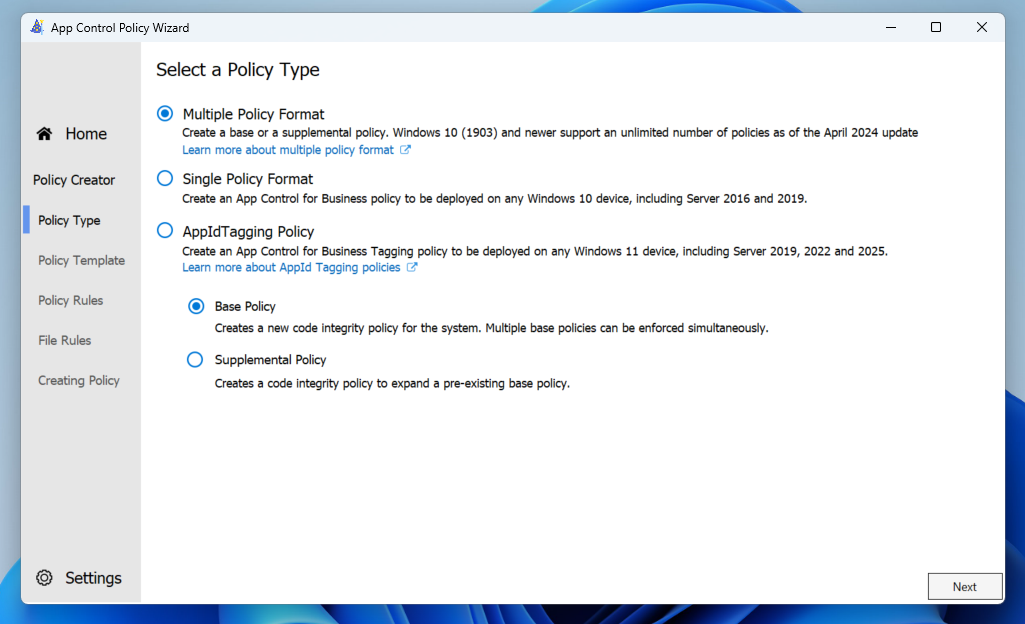
Step 2: Start with a “Multiple Policy Format” and a “Base Policy”:
Step 3: Choose your starting point “Base Template”:
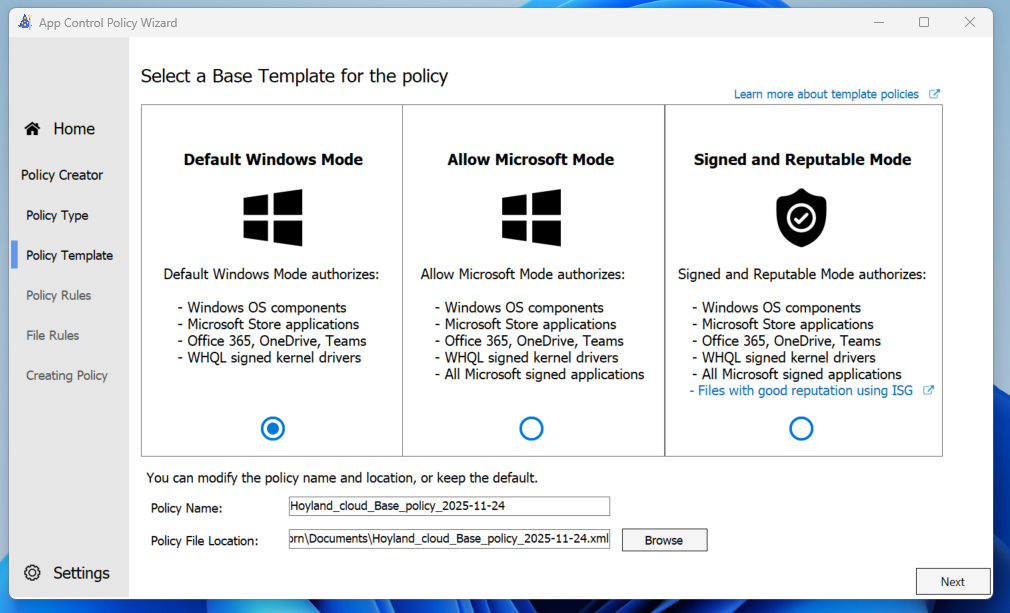
Now, this step (Step 3) requires some additional context. Your Template base will depend entirely on what you are trying to achieve.
- Default Windows Mode
- “I want to create a hard allow-list of everything extra on my OS in order to limit exactly what is allowed to run on the server/client OS.”
- This policy contains “Allows” so that Windows……boots at all.
- Allow Microsoft Mode
- “I want to create a policy there i trust Microsoft software out-of-the-box even though it might not be installed yet “
- Probably a good choice if you are managing pretty standard Windows Clients for office use.
- Signed and Reputable Mode
- “I want Microsoft to maintain a list of safe/unsafe software that im willing to allow on my devices”
- A pretty light-weight WDAC policy that should fit quite a lot of software. Probably easier to “slap on” in a brown-field deployment (as in “not fresh clients”).
Because i love being in control of security, and allowing just barely enough to make the OS float, im going with “Default Windows Mode”, and we will slap on whatever additional extras we need later. We are starting out in Audit mode anyway so it does not really matter (for now)! Pick your poison!
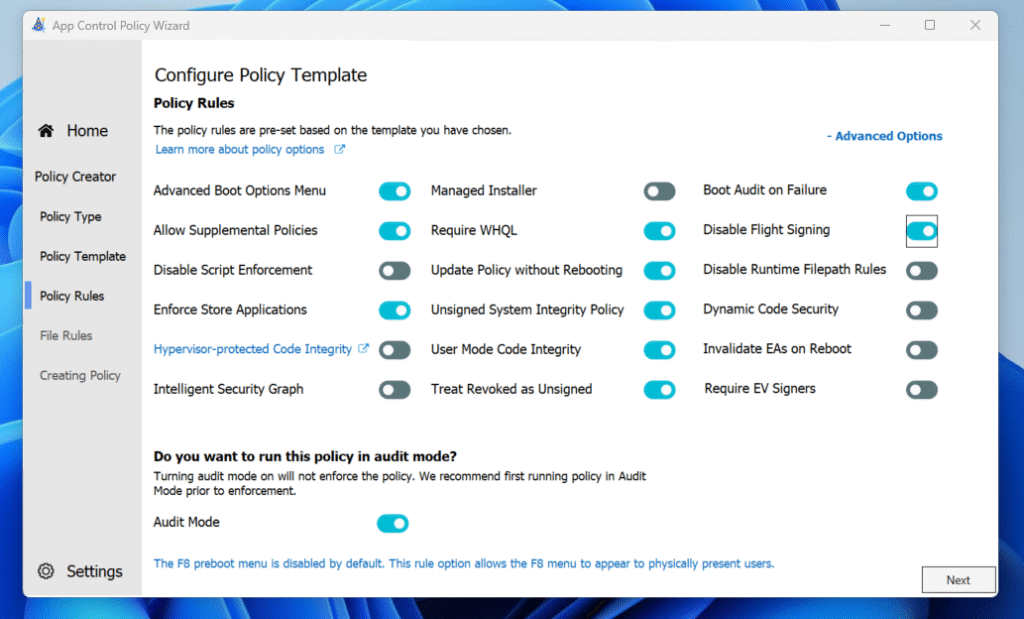
Step 4: Configure Policy Template
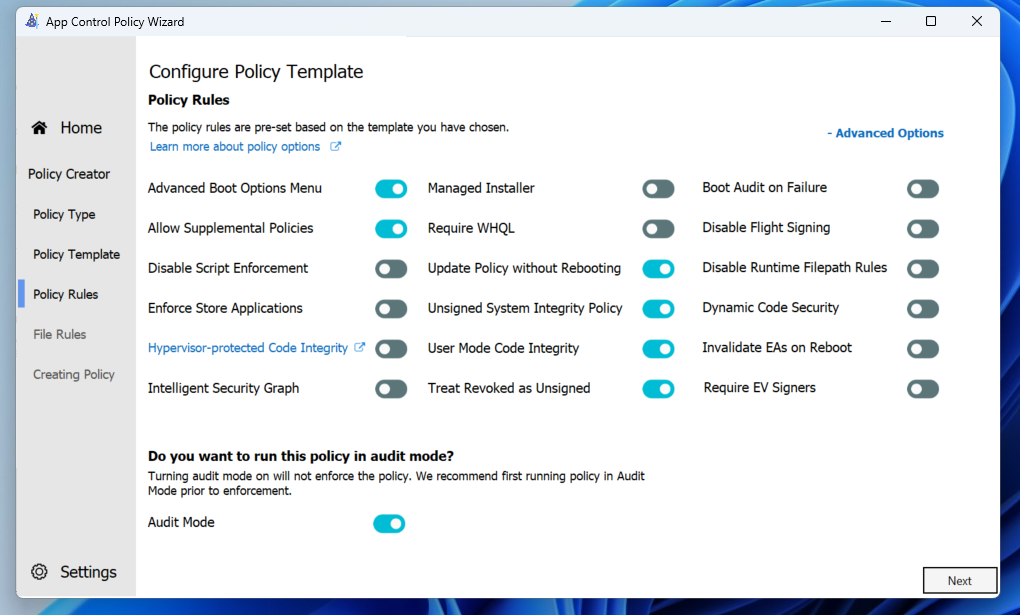
These are the “main selectors” for the base of the policy. All of these buttons have impact for how WDAC will affect your systems. Most of these are unique to the “base” policy, and cannot be set in additional supplemental policies (see the exemptions here). And the main toggle to focus on here is the “Audit mode”. As long as audit mode is on you are pretty safe to test out configurations to make sure you dont break anything. “Boot Audit on Failure” is also a nice thing to have once you go into early production in “block” mode. Because WDAC can block drivers that make your boot fail!
For more context on all of these different toggles, see this Microsoft post. The Wizard also shows some additional info if you hover over each button!
For my Base policy i am going to select the following configuration (In Audit Mode – important):
When we click next we are presented with the list of rules generated by the base selection as well as the selected toggles.
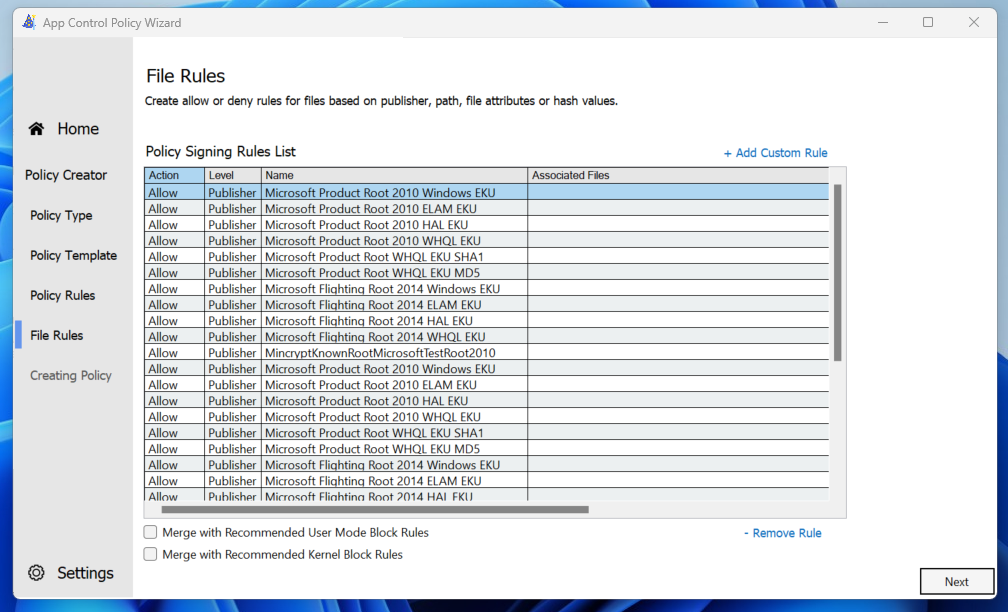
Nice! Its beginning to look like a real set of policies!
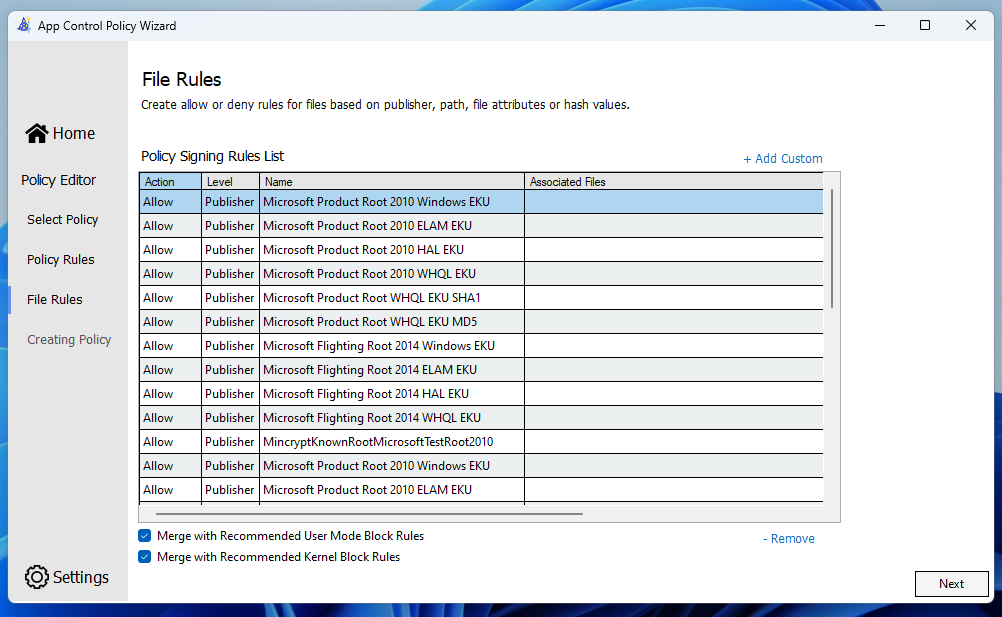
Notice the buttons at the bottom with “Merge with Recommended User Mode/Kernel Block Rules“? These are some beautiful rules that block a common attack vector called “LoLBins” or “Living of the Land Binaries”. These are Native Windows binaries that are commonly abused by attackers to perform malicious actions on machines. We want to block these.
However, depending on your software and os environment, blocking LoLBins might break stuff… Sadly these also have to be part of the base policy, and cannot be applied as a supplemental policy. Not that this makes a big difference in practice, its just a way of managing the layers of the WDAC policy.
We are in audit mode anyway, so whatever! Lets go lolbin-blocking!
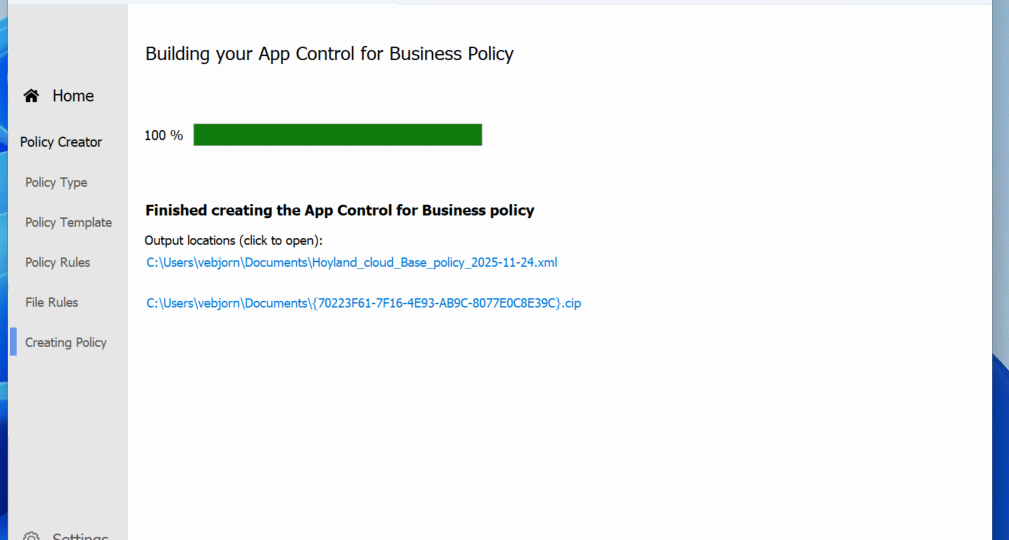
Step 5: Generate the policy files!
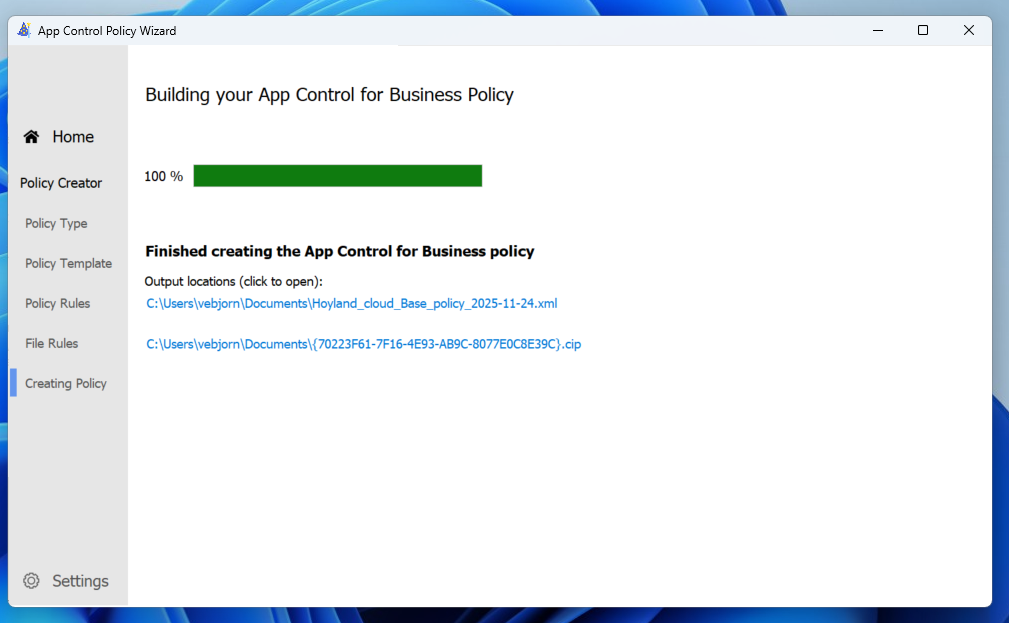
There you go! The policy files are generated! The XML file defines the policy itself and can be edited using the WDAC Wizard later, and the “{{ID}}.cip” is the actual policy that can be implemented on the Windows Systems!
If you are feeling cheeky, feel free to steal this policy from me and pack it yourself! The XML is available on my GitHub here.